How to use workspaces
Workspaces let you separate your screens, content, and users into different groups.
Each workspace is completely independent, so:
- Content in one workspace isn’t visible in another
- Screens belong to only one workspace
- Users can have different roles in each workspace
For example, you might have one workspace for London stores and another for New York stores. A user could manage London screens but have no access to New York.
In this article we are going to create a new workspace, upload a media file to it and then change user access permissions.
Account owner only
Please note only the account owner can create and manage workspaces.
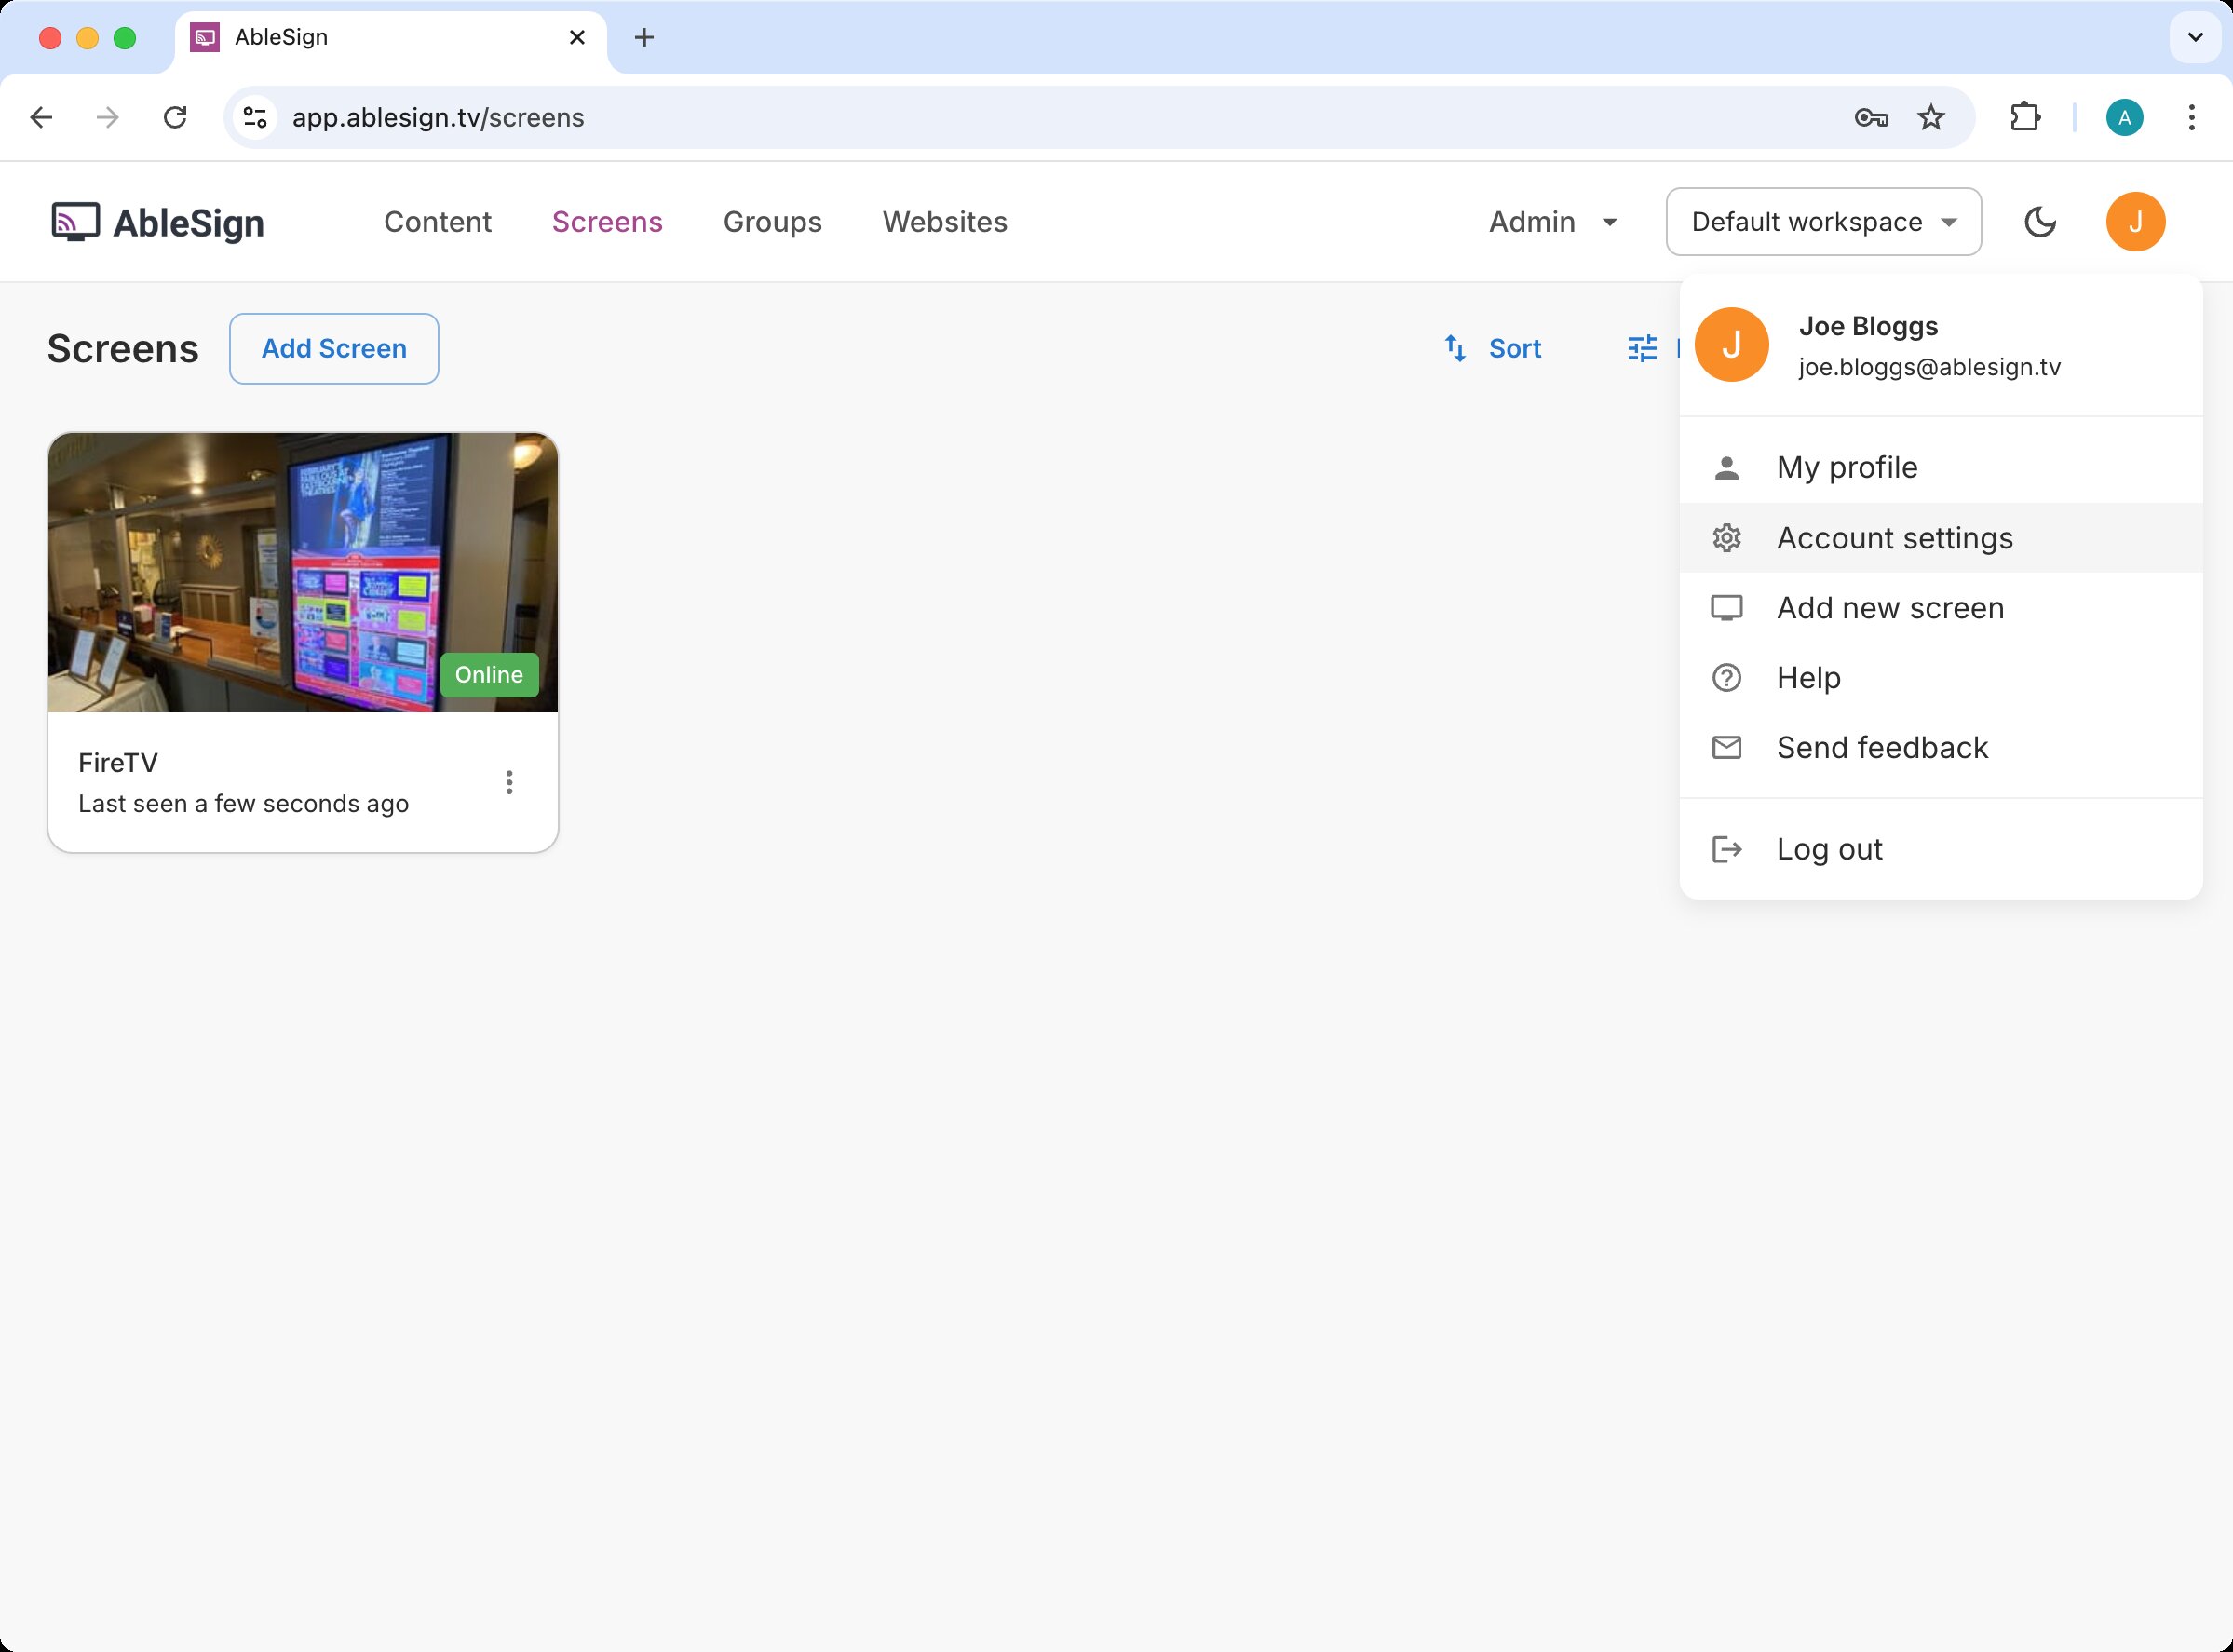
To begin, log in to your account and select Account settings from the top menu bar.
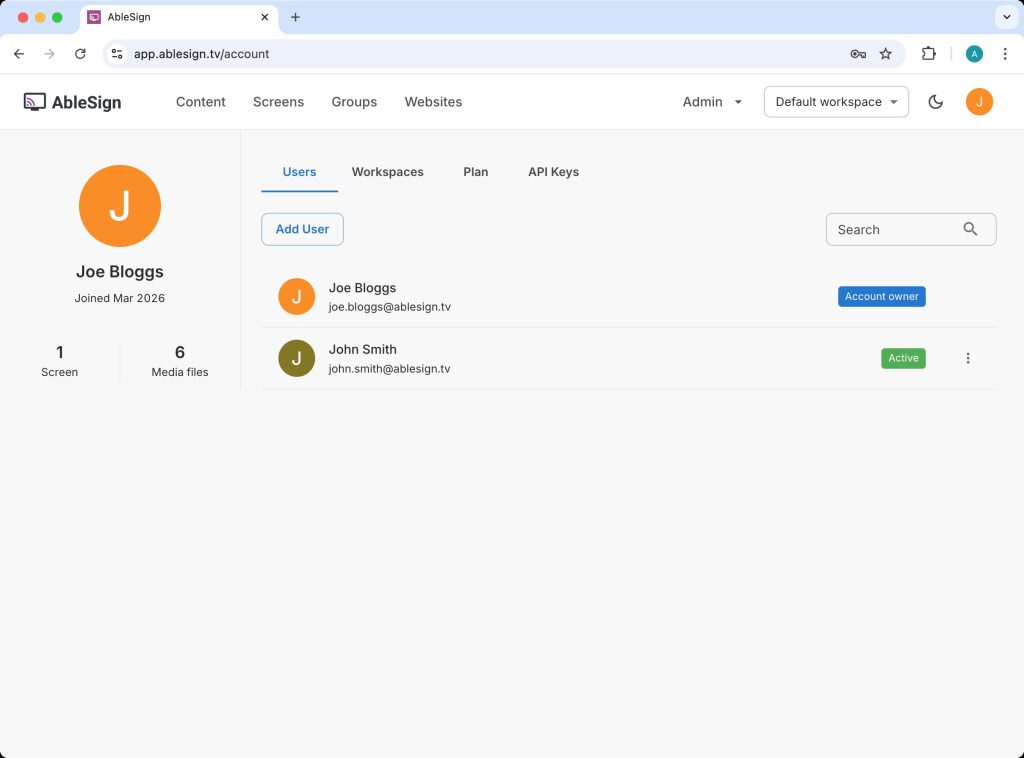
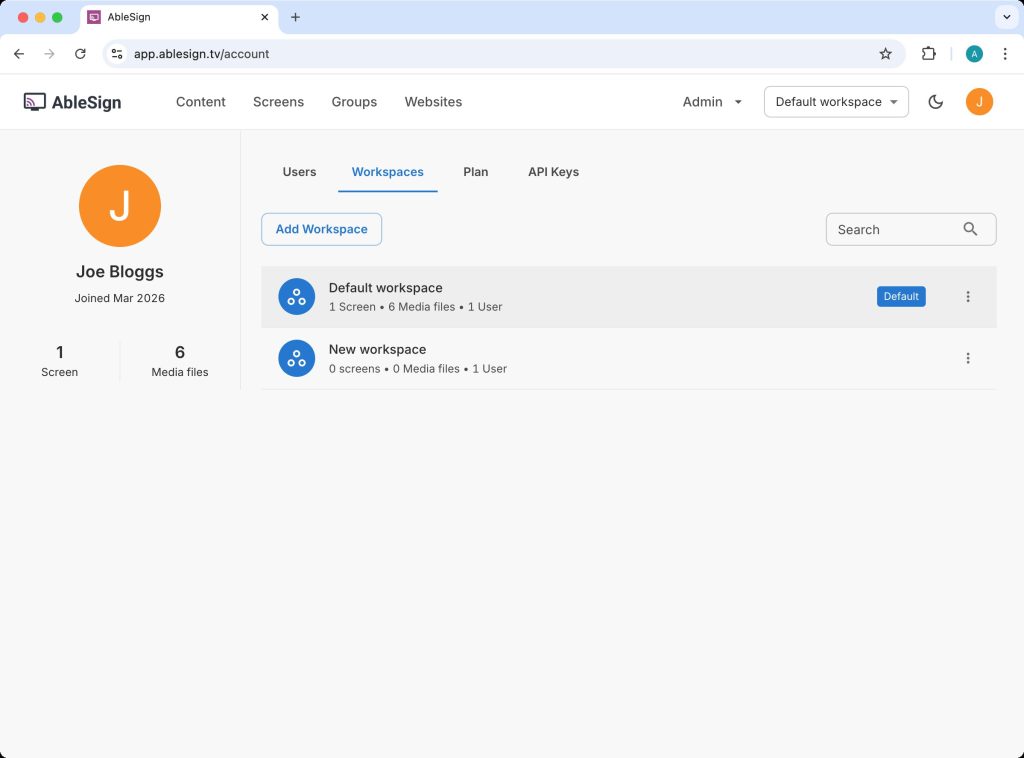
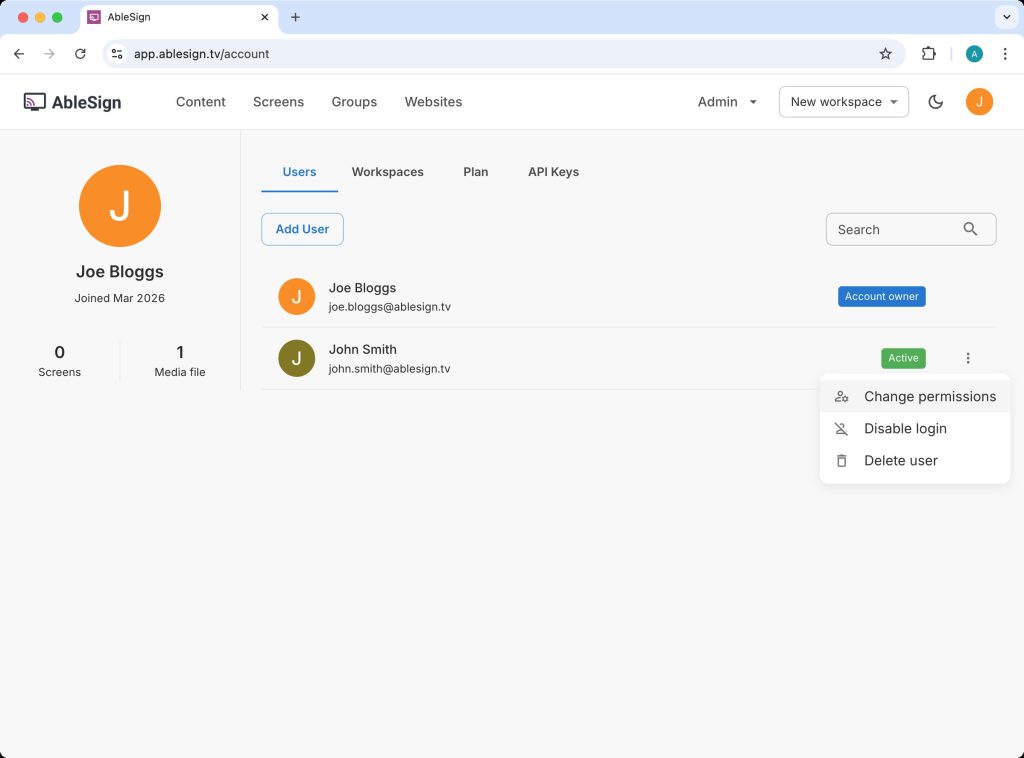
The account settings page appears. The Users tab shows you the current users in your account. In this example we have 2 users.
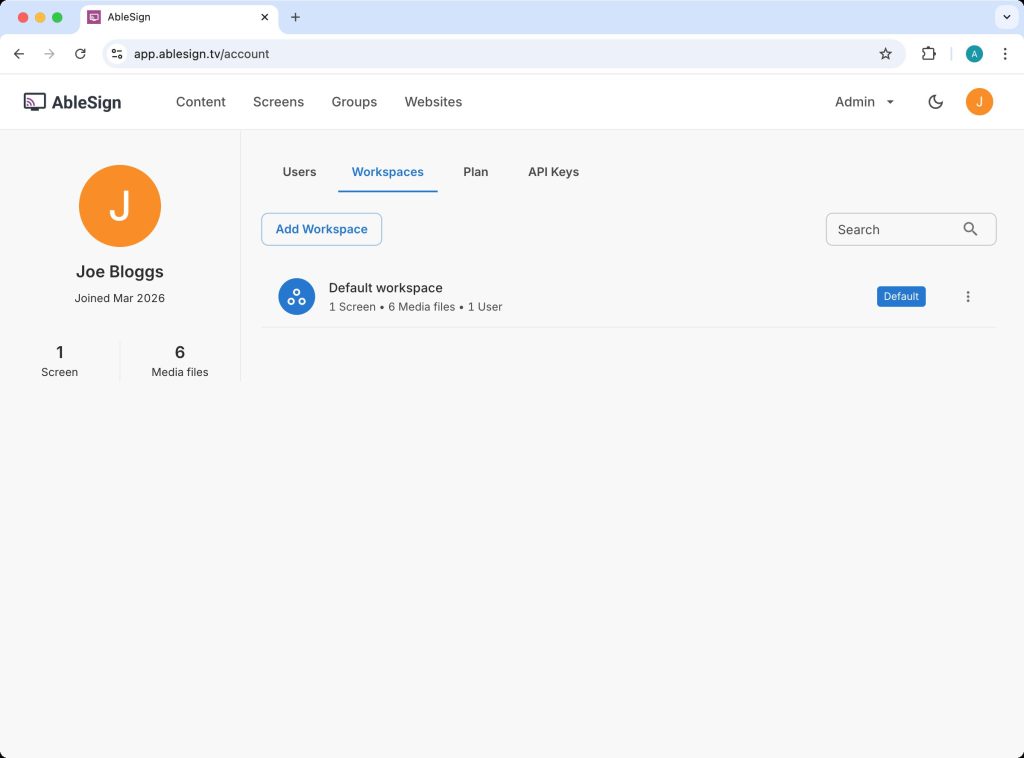
Now click on the Workspaces tab.
The Workspaces tab will show all your workspaces. We are going to create an additional workspace, so click on Add Workspace.
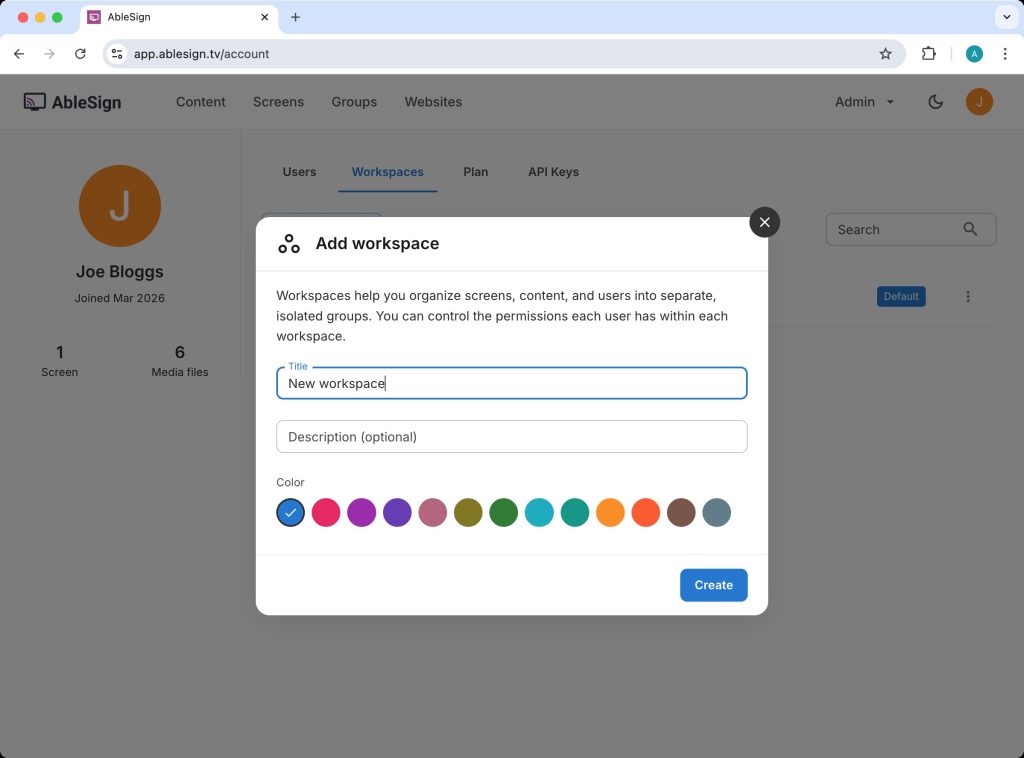
The add workspace form will appear. In this example we are calling the workspace “New workspace”.
Click Create to create your workspace.
The new workspace will be shown in the workspace list.
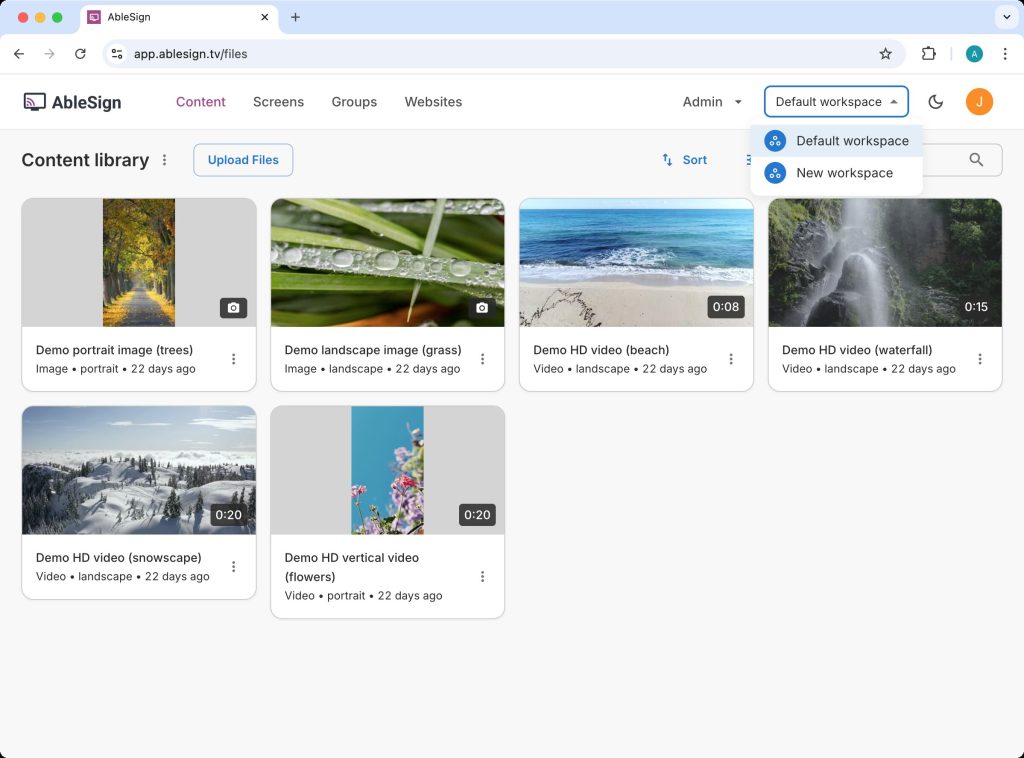
Note that at the top of the page in the menu bar there is now a workspace selector. When a user is a member of two or more workspaces, the workspace selector will appear, allowing them to easily select which workspace to work in.
Let’s upload a file to our new workspace. Click Content in the top menu bar.
You will see the content in your existing Default workspace.
Now use the workspace selector to select the workspace called New workspace.
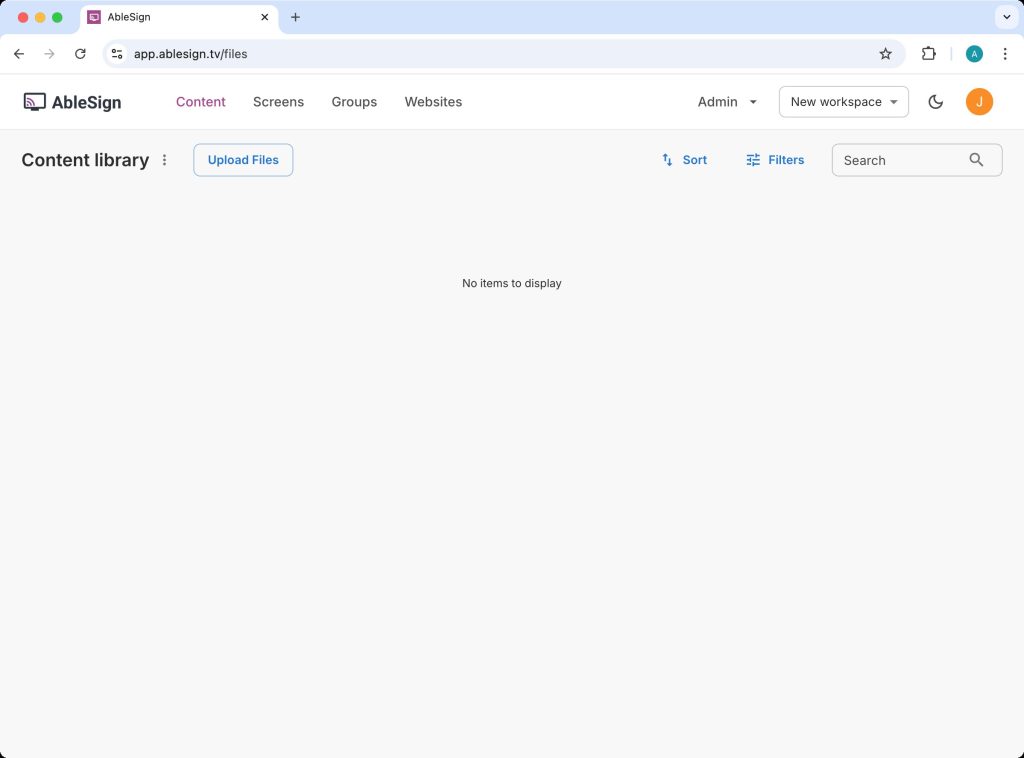
The content library for this workspace is empty. You can upload files here and they will only be visible to users who have the correct permissions for this workspace.
Click Upload Files to upload a media file.
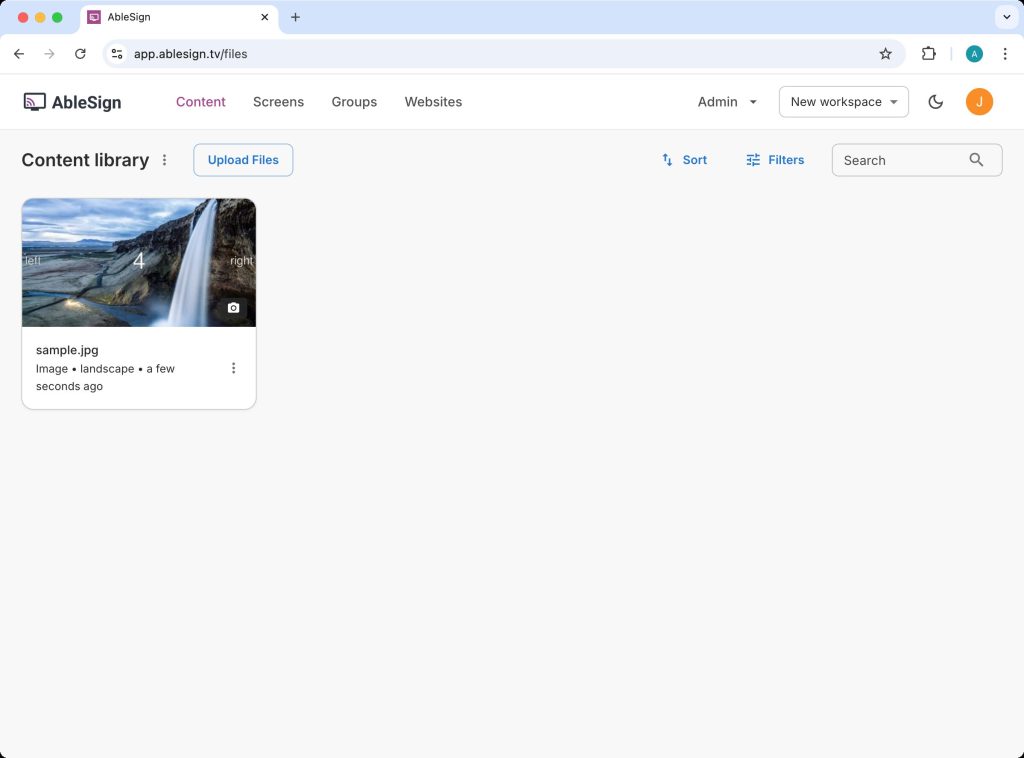
You will now see the uploaded file in your workspace. In our example, we uploaded a file called sample.jpg. Using the workspace selector you can easily switch between the workspaces available.
The next step is to assign permissions to this workspace for other users. To do that, head back to the account settings page from the profile menu.
In our example we have a user called John Smith. Click on Change Permissions.
You can now set the user permissions for both the Default workspace and the New workspace.
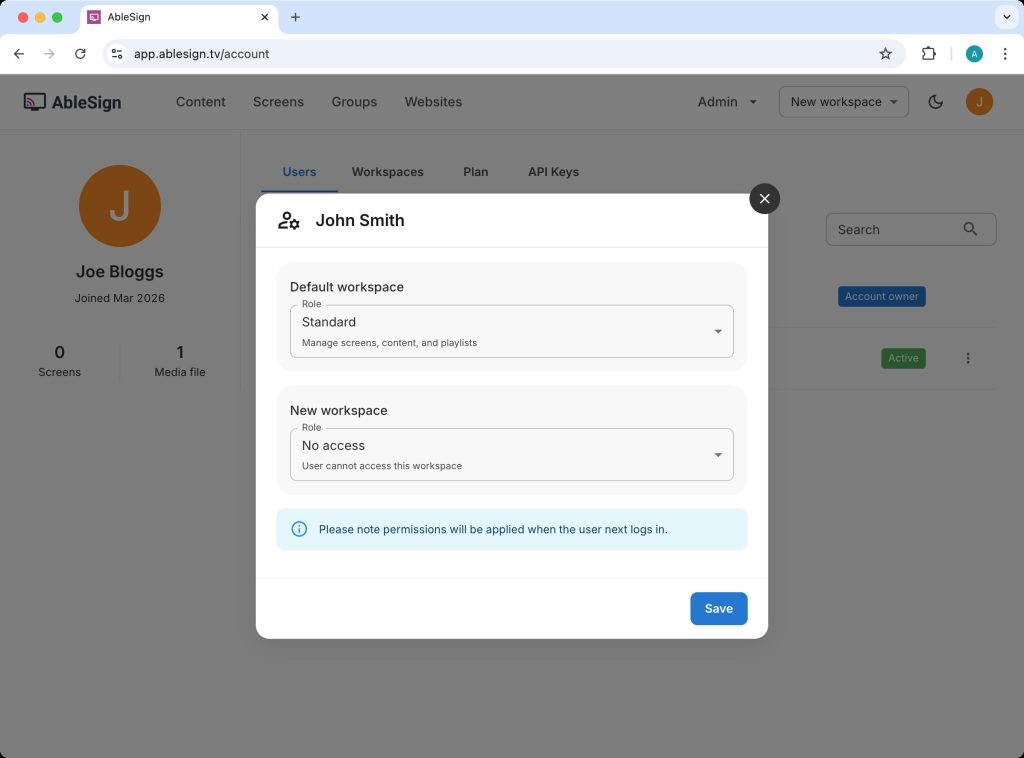
If you set a user to have Administrator permission within a workspace they can invite additional users but only to that workspace.
Moving a screen to a different workspace
If you need to move a screen from one workspace to another, go to the Screens page and click the action menu (three dots) on the screen you want to move. Then select Move to a different workspace.
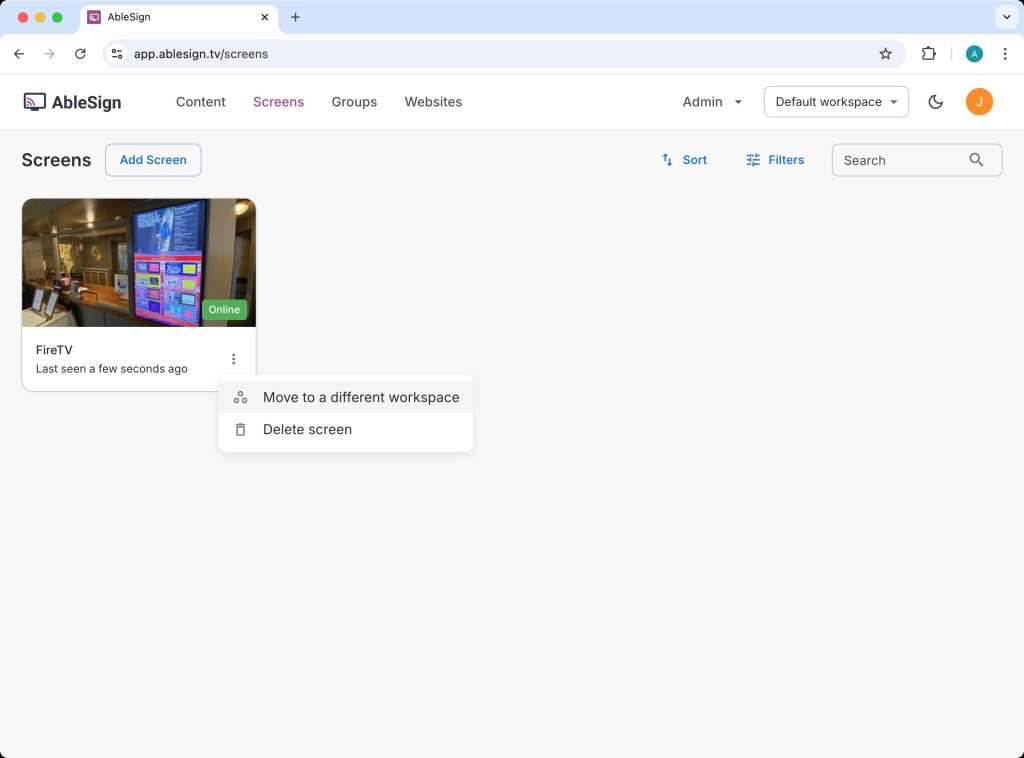
Choose the destination workspace and the screen will be moved there straight away. Note that this option is only available when your account has more than one workspace.
That’s it! You now have separate workspaces with their own content and user permissions. You can create as many workspaces as you need and adjust user permissions at any time from the account settings page.